
Crocheting is the art of transforming yarn into masterpieces. The crochet hooks allow endless creativity that goes beyond garments, accessories, and home décor. One of the essential tools for any crochet enthusiast is a well-organized hook case. Why go for store-bought? When you can crochet it. Get ready to keep your single-ended crochet hooks or, for the matter, Tunisian crochet hooks secure and prepared for crafting sessions. A crocheted hook case will surely delight you even if you want to revamp your crochet hook set. Whether you're a beginner or an experienced crocheter, the project is easy to make as you put basic crocheting skills to use. In this blog, we'll guide you through the steps to work on a personalized crochet hook case that also works as a practical gift for any maker. Are you ready to unleash your creativity?
Gather your materials:

Yarn—Choose durable yarn (cotton or wool) in the mid-weight category. DK weight yarn is perfect as it's not bulky or too light and is also found in abundance in our stash. The hook case is an exciting stashbusting project, as you can use scraps from previous projects to make a beautiful and practical design.
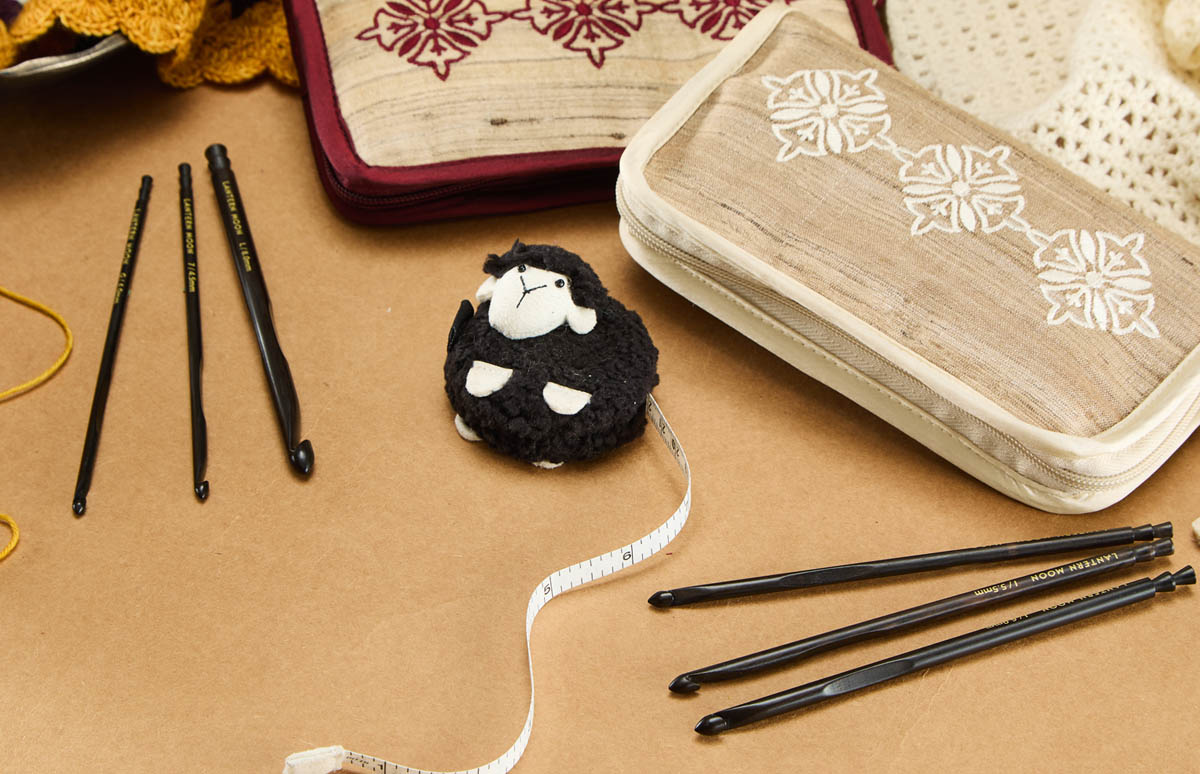
Crochet hooks—The first thing to make sure is that you have the appropriate size for your yarn. You can choose single-ended crochet hooks or work with interchangeable Tunisian crochet hooks. You can work on a simple crochet fabric with both. In the case of Tunisian hooks, make sure not to attach the interchangeable cord if you are not working on Tunisian crochet.
Crochet accessories—Handy accessories are essential for smooth crocheting. Scissors, finishing needles, measuring tape, gauges, tool kits, and yarn boxes will assist you.
Step-by-step guide to making a personalized crochet hook case
Making a personalized crochet hook is an interesting project. The case keeps your hooks organized and easily accessible, allowing you to focus on your projects without any interruptions. Plus, a custom case can add a touch of style to your crochet supplies collection.
Step 1- Plan the Design and Size
The first step to working on your personalized crochet hook case is to plan the design and shape. The crocheted fabric is dense and sturdy, with lots of scopes to put colors, textures, and interesting designs. Plan the case by working out whether you prefer traditional or Tunisian crochet. Also, plan the stitch pattern or colorwork designs. Decide on how many crochet hook pockets you want. Think of how to design the flap. From simple buttoned cases to elaborate Amigurumi crochet designs, there's a lot to explore. Sketch your design or write it down to clearly visualize how you want the hook case to look.
For the size of the case, measure your longest crochet hook to determine the base length. Note it down and calculate the width of the case. The width must be enough to cover all the hooks and a little bit more so that you can also store some crochet accessories.
Step 2 - Work on the base
Begin by making a crochet chain. The length of your chain will determine the width of your case. If you have more or fewer hooks, adjust the chain length accordingly.
For example, you could start with chain 40 (or the desired number of chains). You can also work on a foundation stitch, where you skip the chain and work on the crochet stitch directly.
Work on the crochet stitch you've chosen. F or a dense and sturdy fabric, it is recommended to work with single crochet (SC) and double crochet (DC) in US patterns, which go by the name of double crochet (DC) and treble crochet (TR) in UK pattern abbreviations. Make sure to work on a turning chain to work on case's base. If you are keen on textures on the case's outer side then work on a fabric that can show textures on the project's right side while the wrong side is plain and simple, carrying the hooks.
Step 3 - Make the hook pockets
After you've worked on the base or even while working on the base you can work on this step of making hook pockets. There are two main ways to do this. First, crochet the designated spaces for your hooks directly into the case with alternating colors or stitch patterns. Second, crochet separate pocket flaps and then sew them onto the main body of the case.
You can create additional spaces for accessories such as finishing needles, scissors, stitch markers, and other essentials.
Step 4 - Finishing touches
Once you've finished the hook case, weave in all yarn ends with your finishing needle. If you have worked with multiple yarns, you'll have numerous ends to weave in. Make sure to work them neatly.
To keep your case secure, you can add a button, snap, or Velcro closure. For the button, create a button loop on the flap by chaining a small loop and securing it. You can also put it in a zipper or roll the case and tie it up, making it a design that easily fits your craft bag.
Step 5: Personalizing Your Case
Now that your case is complete, feel free to add personal touches. You can crochet the case in different yarn colors to create stripes or patterns. Or, choose a finishing needle to make duplicate stitches to add to the beauty. If you are a fan of Amigurumi, make something cute that you fancy or add pom-poms.
With this, you have the instructions on how to make a personalized hook case. For smooth crafting sessions, choose Lantern Moon. The premium crochet hooks are handcrafted from ebony wood by skilled artisans. The silk-like finish of wooden crochet hooks makes stitches flow. Explore the range of single-ended crochet hooks or the handy Radiance Set. For the Tunisian crochet hooks, the Bequest Set contains multiple sizes for all your crochet projects.