
Are you getting ready for summer? What better way to welcome the outdoor season than with fresh, inspiring crafting ideas? Just gather your favorite knitting needles in single-pointed, double-pointed, fixed circular or interchangeable circular or even needle sets. The same goes for crochet hooks, just gather single-ended crochet hooks. A Tunisian crochet hook will also do fine as long as you don’t attach the interchangeable cord. Our free crochet pattern takes a unique approach to the classic granny square, transforming it into a funky summer tee that's sure to turn heads.
If knitting is more your style, check out our tutorial on a breezy, easy lace technique with a lovely, undulating look. The Sea Foam stitch can be used to create elegant summer shawls, airy see-through tops, or even market totes. So grab your knitting and crocheting tools, handy accessories and some colorful yarn, and let's get started on a season full of creativity and fun!
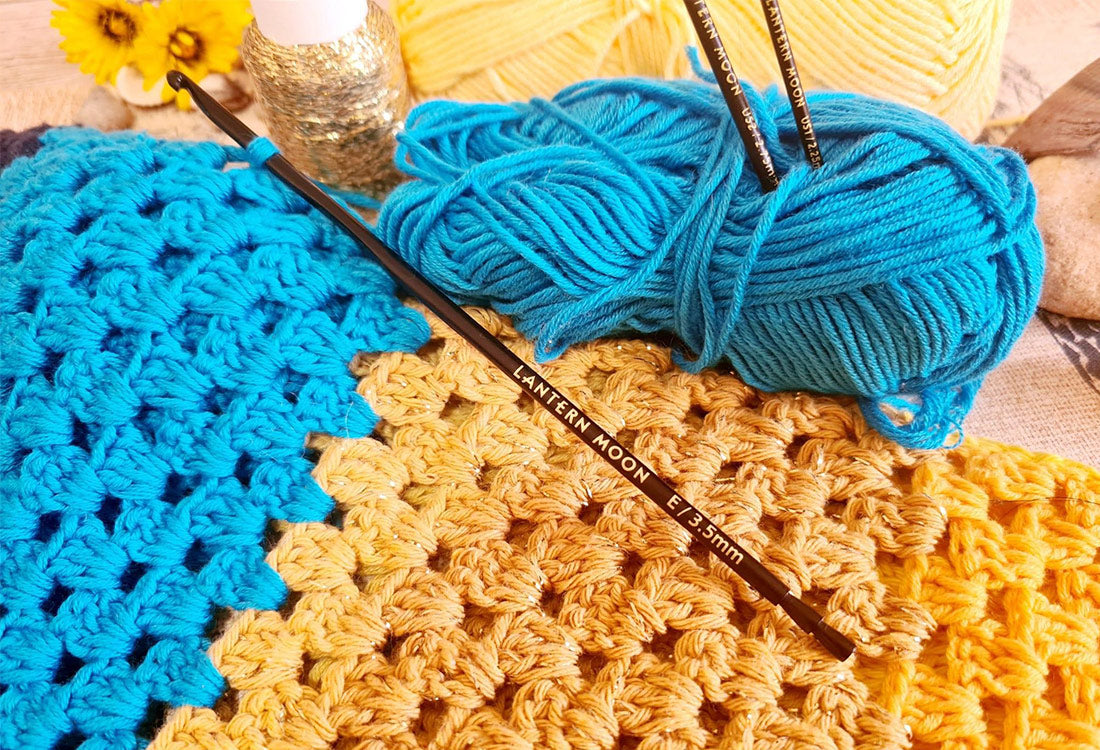
70s-inspired Granny Square Top
Pop some color into your crocheting with this unique top crafted with the granny-square method. If you have never made this beginner-friendly crochet icon before, don’t panic and dip into our quick tutorial on how to craft a classic granny square here. The granny square is a beloved staple of crocheters of all skill levels because of its versatility. All you need is any of your crochet hooks in the right size and some stash yarn to get some practice.
That said, we have put a different spin on the granny square our summer top is based on. To achieve the unique 70s effect, we only crochet half of the round before turning the work and completing the next half round or row. And you know what, this top is also a great way to reduce your yarn stash.
As a summer top should come with some flow but still have texture we recommend using a soft cotton yarn, suitable for a single-ended crochet hook, size 3 - 3.5 mm (D or E).

Abbreviations:
- ch: chain stitch
- sc: single crochet
- dc: double crochet
- sl st: slip stitch
- dc3tog: decrease by crocheting 3 stitches together
Step 1: Start by crocheting ch5 and close them to a ring with sl.st.
Step 2: Ch 2 (this will be your first dc). dc 12 into the chain ring and connect with an sl.st.
Step 3: Ch 2, dc 2, ch1, dc 3, and ch1 into the same stitch. This will form your first granny square corner.
Step 4: Skip 3 stitches, then Dc 3, ch1, dc 3, ch1 into the same stitch ( = 2nd corner). Repeat until you have finished all four corners, connect the last corner with an sl.st. to the first one, then cut the thread.
Step 5: From here on, you only work in half rounds. Ch 2 into the chain stitch of any corner (your first dc of the next row.), dc2, ch 1 into the same stitch, dc 3 around the next chain stitch in the row below, ch 1, dc 3, ch1, dc 3, ch1 around the middle of the next corner, dc 3 around the next chain stitch, ch 1, dc 3.
Step 6: ch 2 and turn your work to create the next row.
Instead of crocheting all four corners of your square, you only have to crochet one corner and two half corners. This way, the central ring automatically forms the fourth corner of your granny square, and you crochet your piece from corner to corner.
Once your granny square has the desired length and width, it is time to shape the neckline. Divide the stitches of your front piece into three sections with lockable stitch markers. Then craft the first halter. You can shape the borders with one, or several dc3tog decreases on each side.
Handy Tips for working the dc3tog decrease:
- Yarn over, and insert your hook into the first stitch.
- Yarn over, and draw up a loop (3 loops on hook).
- Yarn over, draw through 2 loops on the hook (2 loops on the hook).
- Repeat steps 1-3 in the next 2 stitches (4 loops on hook).
- Yarn over, and draw through all 4 loops on the hook.
To craft the back of your Granny Square Top, follow the same pattern as the front piece. If you want to raise the neckline, add more rows to the top of your square, transforming it into a rectangular shape.
Next, join the shoulder and side pieces using the slip-stitch technique. This creates an almost invisible seam and ensures that the stitches line up neatly on top of each other. To simplify the process, we recommend using a hook one or half a size smaller than what you used for the squares. Finish by weaving in all loose tail ends with your finishing needles, and enjoy your unique granny square summer top!

Create a beachy look with the Sea Foam Lace Stitch
The sea foam stitch is not only enjoyable to knit, but it's also foolproof and perfect for creating a flowy texture in your knitted tops, shawls, or pareos, even if you've never knitted lace before. This stitch follows a straightforward four-row repeat pattern, with three rows just worked in a garter pattern. The result is a gorgeous, wavy look that perfectly captures the essence of summer in every stitch. Just get the knitting needles you enjoy working with. Single-pointed needles will be wonderful for a quick back-and-forth knitting session. For a wider project, get circular knitting needles, it does not matter if it’s fixed circulars or interchanegable circulars.
Step 1: Cast on any number of stitches plus 2 selvage stitches that can be divided by 5.
Step 2: Work three rows in garter stitch
Step 3: Knit 1 (selvage stitch), knit 5,
Step 4: Insert the needle into the next stitch and wrap the yarn around your working needle twice. Pull through, leaving the yarn wrapped around the needle. Insert your needle into the next stitch. Now, wrap the yarn three times around the needle tip. Again knit the stitch, leaving the yarn wrapped around the tip. Insert your needle into the next stitch and wrap the yarn four times around the needle. Now you are at the peak of your sea foam wave. With the next two stitches, wrap the yarn around the needle tip three times, then twice, respectively.
Step 5: Repeat step 4 until the end of the row, then knit the selvage stitch.
Step 6: In your next row (wrong side), knit all stitches, unraveling the loops around the needle.
Step 7: Knit 2 more rows, then repeat the sequence.

While knitting the pattern stitches, the yarn overs create graduating eyelets in the fabric, which can be emphasized by blocking your finished piece.